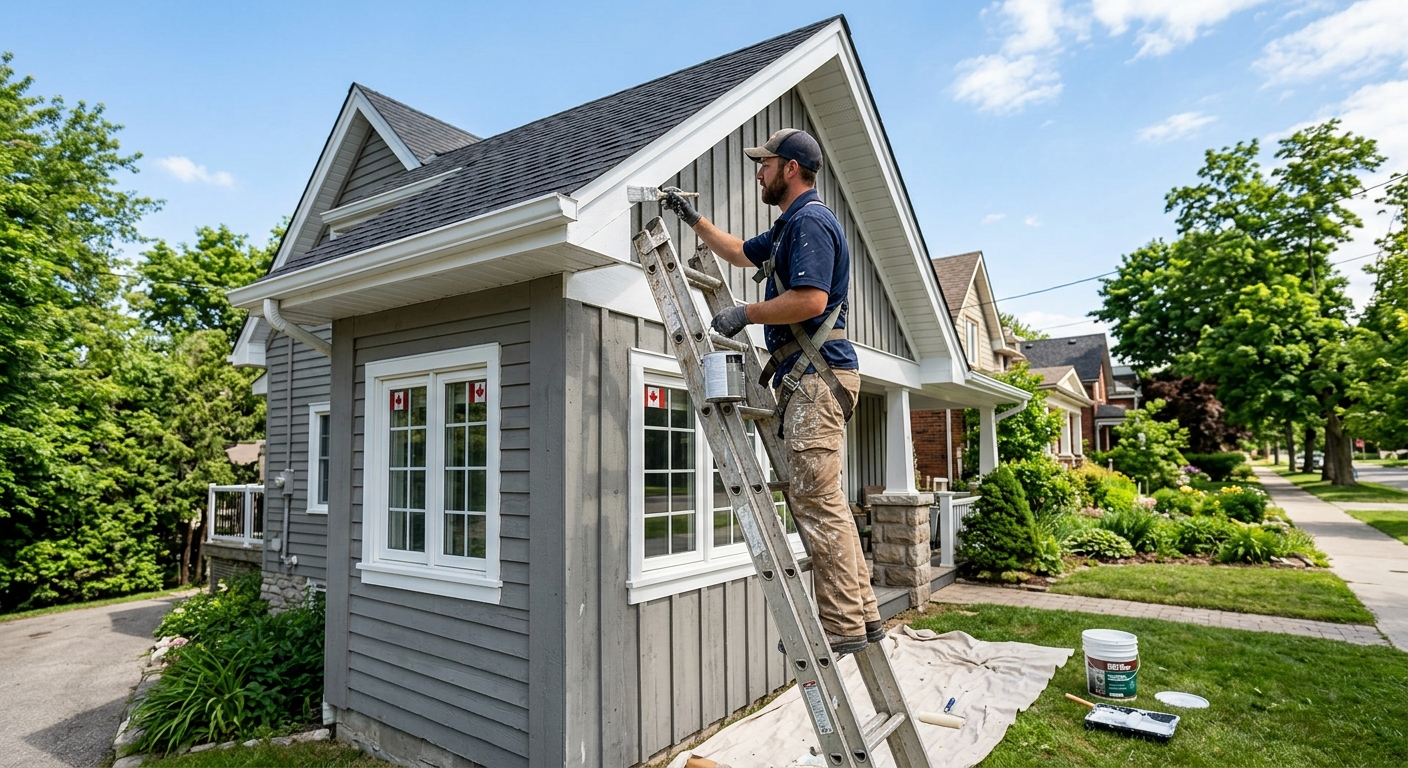
Painting options and costs in Pelmo Park-Humberlea
Pelmo Park-Humberlea, Ontario sits inside the Toronto painting market, where homeowners often want a “fresh look” without running into peeling, flashing, or trim that chips too soon. With a population of 10,722 (Statistics Canada, 2021 Census), the area’s contractor availability is generally strongest in the GTA’s short exterior window—so scheduling and surface prep are big drivers of cost. Many local properties are older; across Toronto, a sizable portion of housing predates modern application standards and weatherproofing details, which typically means more scraping, patching, caulking, and priming (and sometimes lead-safe precautions if pre-1978 materials are present). On a repaint, preparation can take half the labour or more, especially around windows, eaves, and rough-sawn trim.
In the GTA, exterior work is tightly climate-bound. Contractors typically plan crews from late May through June, then again September into mid-October when temperatures are around or above 10°C and conditions stay stable for proper curing. That short “ideal” period, plus summer demand, is why exterior pricing can run 10–15% higher in June–August compared with a spring-or-fall shoulder week. Interior painting is less seasonal, but you still pay for masking, moving and covering furnishings, and detailed work around stairwells and ceiling edges.
If you’re comparing quotes, start with the scope (whole home vs. per-room, and full exterior vs. trim-only). The table below lays out common options and price bands for Pelmo Park-Humberlea so you can benchmark your estimate before we talk details.
| Service |
What's Included |
Typical Duration |
Price Range |
| Interior — whole home (walls, ceilings, trim) |
Protect floors and fixtures, prep (patch/sand), prime as needed, paint walls and ceilings, caulk and touch up trim; basic cleanup at completion |
4–10 days (varies by square footage and number of rooms) |
$2,200 – $6,000 |
| Interior — per room (standard bedroom or living room) |
Prep and prime spot areas, paint walls; include standard trim painting touch-ups where accessible; light protection and cleanup |
1–3 days per room |
$400 – $1,400 |
| Exterior — full house (siding, trim, soffits) |
Wash, scrape/sand, patch and caulk, prime bare spots, paint siding and all exterior trim/soffits; weather-sensitive scheduling |
5–14 days (season and scaffolding access affect timeline) |
$3,000 – $8,000 |
| Exterior — trim and accent colours only |
Targeted prep and spot priming, paint trim, doors (if included), railings and accents; excludes full siding repaint |
2–6 days |
$1,500 – $4,500 |
| Kitchen cabinet painting (doors, frames, spray finish) |
Degrease, degloss/sand, prime and spray finish on doors and frames; hardware handling as agreed; multiple coats with cure time |
5–12 days including dry/cure between coats |
$2,000 – $4,000 |
| Specialty / faux finish (accent wall, texture) |
Surface prep for specialty application, base coat, specialty process (texture/faux), clear protection as needed for location |
1–5 days depending on complexity |
$600 – $5,000 |
Prices are estimates only and vary by project scope, site access and material selection.
What affects the price of painting in Pelmo Park-Humberlea
Even when two homeowners describe the “same” job, quotes across Toronto can differ by 30–50% because preparation scope, product tier, labour rates, and access realities aren’t uniform. In a city where exterior painting rides a short weather-dependent season, contractors price for risk: rain days, humidity spikes, and curing delays can compress productivity. The GTA’s exterior window typically runs roughly late May to early October; crews need temperatures above about 10°C for application and then reasonable conditions for 24–48 hours of curing. Coastal BC can often paint longer, but persistent dampness and mildew risk push contractors toward higher-end mildew-resistant systems and more careful timing; in the GTA the bigger constraint is frost/rain/humidity rather than year-round moisture.
Older homes across the Toronto region also increase labour. More layers of paint and aged caulking translate into additional scraping, sanding, patching and priming—often 50–70% of labour on repainting. For example, if your siding is chalky or flaking, the same “full house” exterior project that might start around the lower end of the $1,500–$8,000 exterior band can climb quickly after we remove loose material and add primer to multiple substrate types. Similarly, interior repainting can start in the $400–$6,000 range, but if ceilings have stains, or stairwells require careful masking and detail work, the prep time expands and drives the higher end.
In Pelmo Park-Humberlea specifically, cost can shift based on three common situations: older trim that needs caulking replacement, soffits and eaves that trap moisture and require more scraping/primer, and multi-storey access that may trigger scaffolding or lifts. If lead-safe precautions are needed for pre-1978 components, that can add time and materials to keep the work safe and tidy.
| Price Factor |
Why It Matters |
Cost Impact |
| Surface prep — scraping, sanding, patching drywall or wood |
Adhesion and longevity depend on removing loose material and correcting surface defects. |
Often the largest variable; can add 30–60% vs. “light prep” jobs |
| Number of coats — 2-coat system over primer vs. 1 coat over existing |
Coverage and uniform sheen require correct layering, especially when changing colours. |
1 additional coat can add 10–25% labour/materials |
| Paint quality tier — contractor-grade vs. premium (Benjamin Moore, Sherwin) |
Premium systems often cover better and resist staining, scuffing and fading. |
Material delta can be 5–15% of the total, but reduces rework risk |
| Ceilings and trim — adds significant time vs. walls-only |
Ceilings require careful edge work and masking; trim needs prep and caulking. |
Can shift a room estimate by 15–40% depending on detail |
| Exterior season window — short season raises summer rates |
Fewer “ideal” weeks increases demand and scheduling premium. |
Typically adds 10–15% in June–August vs. shoulder weeks |
| Lead-safe precautions — required for pre-1978 homes with lead paint |
Safe handling may include containment, wet methods, HEPA cleanup and disposal steps. |
Can add noticeable time/materials if lead is present or suspected |
| Surface material — drywall vs. plaster vs. wood vs. stucco |
Each substrate needs compatible primers and different prep routines. |
Unsupported substrate issues can add 10–30% |
| Height and access — multi-storey exterior requires scaffolding or lifts |
Access equipment and safety increase labour time and overhead. |
Can add 10–25% depending on reach and ground conditions |
Permits & regulations in Ontario
In Ontario, painting generally does not require a permit. There are, however, important safety expectations and documentation practices that separate a professional paint job from a “patch and roll” approach. For homes built before 1978, health guidelines recommend testing for lead paint before sanding or scraping, and if lead is present, using lead-safe work practices (wet methods to control dust, HEPA vacuuming, proper containment, and disposal). That guidance isn’t something homeowners are legally forced to follow, but reputable contractors in Ontario treat it as standard practice because sanding dry lead paint is where most preventable exposure risks happen.
From a permits standpoint, the work that typically does not require a permit includes: painting interior walls/ceilings/trim, repainting exterior siding and trim, and caulking and priming as part of repainting. Work that may require additional approvals is usually tied to building modifications rather than painting itself—examples include structural changes, exterior cladding replacements, or work that affects egress or major envelope alterations (not typical “paint-only” scope).
Before you hire a Pelmo Park-Humberlea contractor, verify three things: (1) Ontario licensing/registration where applicable for their business category, (2) liability insurance via a certificate of insurance showing coverage amounts, and (3) workers’ compensation coverage (WSIB/WCB) to confirm they’re set up to cover workplace injuries. Ask for a written contract listing paint brand, sheen level, number of coats, and the exact prep included. Also request a clearance letter or document trail when lead-safe testing and abatement procedures are part of the plan.
Interior vs exterior painting — getting the best result in Pelmo Park-Humberlea
In Pelmo Park-Humberlea, the difference between a long-lasting paint job and a premature failure usually comes down to surface prep, correct materials, and realistic curing conditions. For interiors, start with prep: patching, sanding, priming stains, and addressing drywall joints or old texture. The topcoat matters, but it’s second to whether the wall base is sound and properly primed. Sheen choice also affects wear: flat/eggshell can suit low-traffic ceilings and dining rooms, while satin or eggshell on walls typically cleans up better for everyday life. Two coats over a properly primed surface generally outlasts a “thick single coat” approach—especially when covering dark colours or repairing scuffed areas.
For exteriors, prep is even more critical in the GTA’s freeze–thaw and rain cycles. Scrape and sand loose paint, wash contaminants, and caulk before painting to prevent water ingress behind trim. Primer selection matters by substrate: different primers help bond to wood, fibre cement, and previously painted surfaces. In this region, you don’t need the same mildew-centric focus that drives decisions in damp coastal climates, but you do need temperature-stable application practices and products that cure reliably in humid, shifting fall weather. If your home is pre-1978, lead-safe precautions may also be required on trim and window areas.
Kitchen cabinet painting is a strong budget alternative to replacement when the box is solid and hardware and door alignment are manageable. For example, if a full cabinet replacement runs far beyond typical painting budgets, cabinet painting typically lands in the $2,000–$4,000 range in the GTA market band; the best value comes when you’re budgeting for thorough sanding/degreasing and a spray-style finish. If you’re only doing a quick brush coat over greasy hinges or worn surfaces, that “saves money” up front but usually costs more later.
| Project Type |
Key Prep Step |
Recommended Coats |
Price Band |
| Interior — fresh drywall (new construction) |
Drywall mud spot-priming and full leveling where needed, then caulk for edges |
2 coats (primer as specified, then two finish coats for uniform coverage) |
$700 – $2,500 |
| Interior — repaint (good condition, no repairs) |
Wash/degloss light scuffing and mask properly; prime only stains or sheen issues |
2 coats |
$400 – $1,500 |
| Interior — repaint (patching and priming needed) |
Patch and sand repairs, spot-prime patched areas and any water/stain areas |
2 coats, often with additional primer spots |
$600 – $2,200 |
| Exterior siding (wood or fibre cement) |
Scrape loose paint, wash, sand, prime bare spots and caulk gaps before finish |
2 coats over primer/bare spots |
$3,000 – $8,000 |
| Exterior trim and accents only |
Detail sanding and caulking at window/trim joints; spot-prime exposed edges |
2 coats (or 1 + touch where approved by substrate condition) |
$1,500 – $4,500 |
| Kitchen cabinets (spray finish) |
Degrease thoroughly, sand/degloss, then prime for bonding before spraying topcoat |
2–3 coats depending on coverage and sheen (typically 2 finish coats) |
$2,000 – $4,000 |
How to choose a painting contractor in Pelmo Park-Humberlea
Choosing the right painter is mostly about confirming they’re insured, competent with prep, and clear on scope. Start with verification: (1) Ontario licensing/registration—ask for their business details and confirm what’s publicly listed for their role. (2) Liability insurance—request a certificate of insurance naming you as the certificate holder if your contract supports it, and check the coverage amounts are reasonable. (3) WSIB/WCB coverage—ask for proof so you know you’re not exposed if a worker is injured on your property. A contractor who won’t provide documents up front is a major risk.
Next, require 2–3 itemised written quotes. “Labour + materials” should be broken out clearly, not lump-sum only, and the scope should specify prep actions (wash/scrape/sand/patch/prime), caulking and whether disposal is included. Ask whether a permit pull is included—painting typically doesn’t need one in Ontario, but the contract should clearly state what’s covered so there are no surprises. Warranty matters: look for a written workmanship warranty length (and what it covers), plus the manufacturer warranty terms for the paint system. Clarify if warranties are transferable if you sell your home.
For payment, keep it controlled: never pay more than 10–15% upfront. Hold back a portion until the job is fully complete, cleaned up, and touch-ups are done. Get a start date and completion estimate in writing, and ask what happens if exterior weather doesn’t cooperate.
- Provide proof of liability insurance before work begins (certificate available on request).
- Provide WSIB/WCB proof (not just verbal confirmation).
- Use a written scope with prep steps spelled out (wash/scrape/sand/prime/caulk).
- List paint brand, product line, and sheen (flat/eggshell/satin/semi-gloss).
- Confirm number of coats and where extra coats apply (stains, patches, colour change).
- Detail what’s included in cleanup and disposal of chips/rags/paint waste.
- State whether lead-safe practices apply for pre-1978 materials and what’s included.
- Show timeline for cure time—especially important for cabinets and exterior topcoats.
- Photo expectations: ask about pre-job and post-job walkthrough photos.
- Confirm access approach (lifts/scaffolding) for multi-storey exteriors.
- Confirm protection plan for floors, landscaping, windows and vehicles.
- Warranty and exclusions in writing, not only in a verbal promise.
Red flags in Pelmo Park-Humberlea include: quotes that skip surface prep details, promises of “no primer needed,” refusing to share insurance/WSIB documents, asking for most payment upfront, and changing scope mid-project without a signed addendum—especially common when exterior timelines slip due to rain or humidity.
Frequently asked questions — painting in Pelmo Park-Humberlea
How much does it cost to paint a house in Pelmo Park-Humberlea?
In Pelmo Park-Humberlea, the cost depends heavily on whether you mean interior, exterior, or both, and how much prep is required. For a whole interior repaint (walls, ceilings and trim), many projects land anywhere from $2,200 – $6,000 depending on home size, ceiling height, and repair needs. For exterior painting, a full house typically falls in the $3,000 – $8,000 band because scraping, patching, caulking and priming often take up most of the labour on repaint jobs. GTA exterior pricing can also be higher in June–August due to the short ideal weather window and contractor demand (Statistics Canada, 2021 Census for local population context).
How much does interior painting cost per room in Pelmo Park-Humberlea?
Per-room interior pricing usually reflects the time to protect the space, prep edges, and apply two finish coats. For a standard bedroom or living room with moderate prep, many estimates start around $400 – $1,400 per room. If the room needs extra repairs—cracks, nail pops, patched drywall, stain blocking on ceilings—or if trim and detailed cut-ins require more time, your quote typically moves toward the higher end. If your walls are in good shape and you’re just refreshing the colour, you’ll usually get the most accurate estimate once the contractor reviews the existing sheen condition and any problem areas.
When is the best time for exterior painting in Pelmo Park-Humberlea?
The best time in Ontario is when temperatures stay reliably above about 10°C for application and then allow proper curing for 24–48 hours. In the GTA, contractors typically work from late May through June, then again September to mid-October. June–August can cost more because demand peaks during the limited “ideal” weeks—so you’ll often get better value by booking for late May/early June or early/mid-September when weather is favourable but scheduling is less competitive. If your siding or trim is showing flaking paint, prep must happen before topcoats, so you need at least a short stretch of dry weather for washing, scraping, priming and caulking.
How many coats of paint do I need?
Most quality jobs use a 2-coat system because it improves coverage, uniformity and durability. For interiors, that usually means two finish coats, with primer applied where the substrate needs it—such as repaired drywall, stained areas, or when you’re changing colours significantly. For exteriors, it’s also commonly two coats over primer/bare spots, especially on scraped areas and new caulking. Skipping primer or relying on “one heavy coat” is a common reason paint fails early (peeling, flashing, and patchiness). Your contractor should specify the primer and number of coats by surface condition in the written contract so you can compare quotes fairly.
What paint is best for Pelmo Park-Humberlea's climate?
For Pelmo Park-Humberlea and the wider GTA, exterior paint needs to handle cycling temperatures, rain, and humidity swings—so product compatibility with your siding and trim matters as much as brand. A professional will match primer and topcoat to substrate (wood vs. fibre cement vs. previously painted surfaces) and choose systems that tolerate freeze–thaw and resist cracking or adhesion failure. Unlike coastal dampness-focused climates, GTA failures often relate to moisture getting under poorly caulked joints or paint that didn’t cure properly during humid or rainy stretches. If you’re repainting and your home has older trim, lead-safe considerations may also influence which areas are treated and how prep dust is managed.
How long does exterior paint last here?
Longevity depends on prep quality, coating system, and how the house tolerates Ontario weather. With proper scraping/washing, correct primer on bare areas, and sound caulking before topcoats, many exterior paint projects can last several years before needing touch-ups, and longer if conditions are stable and the product system is appropriate. If exterior prep was rushed—paint left on flaking areas, minimal priming, or caulking done after painting—failure can show sooner, sometimes within a few seasons, especially around eaves, trim edges, and window lines. The schedule matters too: coating too early in spring cold or closing a job in wet/humid conditions can shorten lifespan.