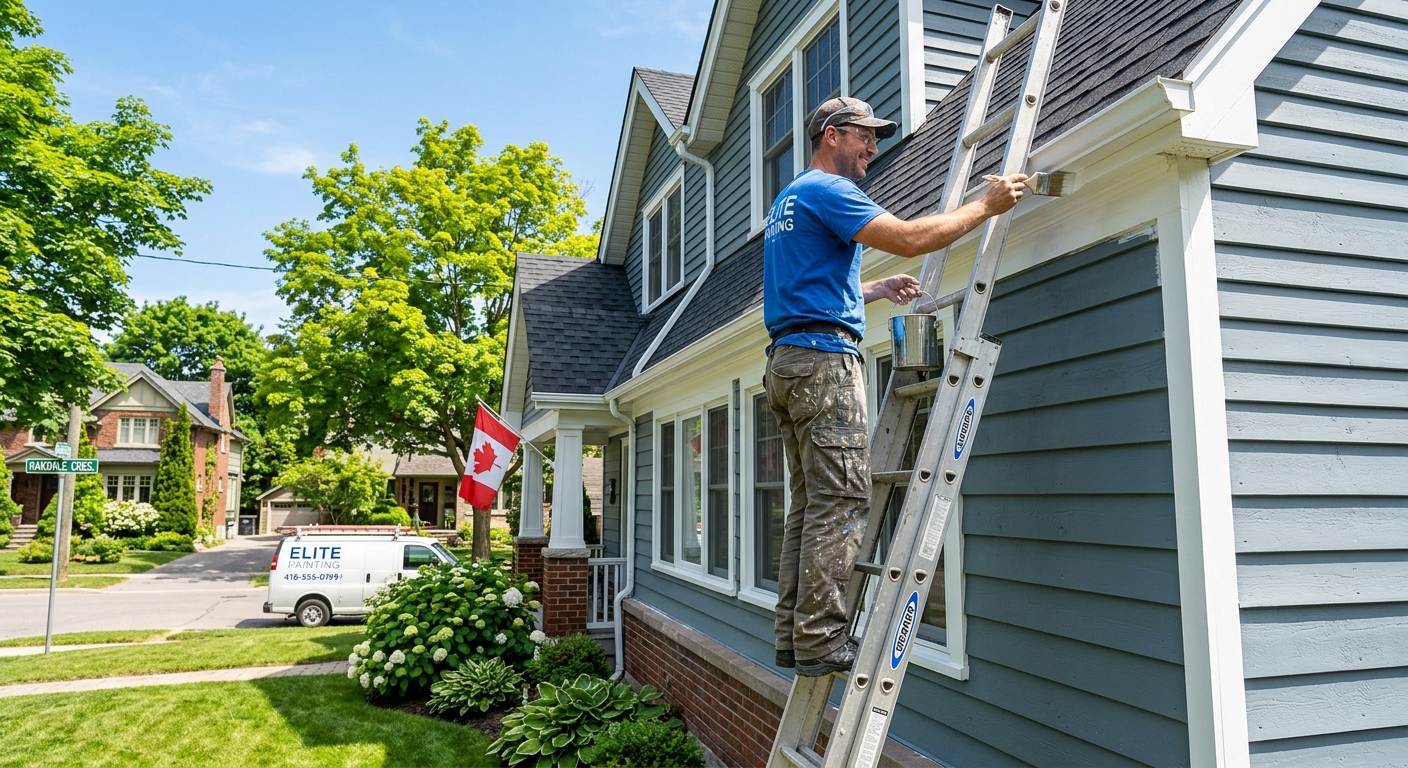
Painting options and costs in Runnymede-Bloor West Village
Painting in Runnymede-Bloor West Village can look straightforward on paper, but the details are what drive cost. With the Toronto housing stock, you’ll often run into older properties; across this area, the pre-1980 home count is significant, which usually means more prep—scraping loose paint, patching at caulking joints, sanding tight areas, and priming to create a consistent base. In fact, the local population was 10,070 in 2021 (Statistics Canada, 2021 Census), and that steady demand shows up in scheduling: contractors tend to prioritize occupied homes and the busiest exterior weeks first. For pre-1978 elements (like older trim, railings, some window components), standard contractor practice is lead-safe work methods, especially if there’s cracking, rubbing, or friction-sanding involved.
In the Greater Toronto Area, exterior painting is tightly bound to a short, climate-dependent window. Typically, crews target late May through June and then again September to mid-October, when temperatures stay around 10°C or higher for at least 24–48 hours after application. During June–August, peak demand can push prices roughly 10–15% higher, mostly due to scheduling pressure rather than permanent dampness. That’s different from coastal regions where mildew risk and constant moisture often force a higher product tier and more obsessive timing. In Runnymede-Bloor West Village, the main cost drivers are frost risk, rain days, and humidity spikes that can slow drying and extend turnaround time—especially on multi-storey facades.
Below are realistic price ranges homeowners in Runnymede-Bloor West Village commonly see, then we’ll break down what pushes each quote up or down.
| Service |
What's Included |
Typical Duration |
Price Range |
| Interior — whole home (walls, ceilings, trim) |
Patch/fill minor defects, sand where needed, prime repaired areas, paint walls/ceilings, caulk trim gaps, 2–coat finish where specified, dust control/masking |
5–12 days (depending on size and trim amount) |
$3,500 – $6,000 |
| Interior — per room (standard bedroom or living room) |
Protect flooring, prep walls, fill/sand small holes, prime if needed, paint walls and ceiling, basic trim touch-ups (as scoped) |
2–4 days |
$400 – $1,800 |
| Exterior — full house (siding, trim, soffits) |
Pressure wash, scrape/sand loose paint (as required), caulk joints, prime bare areas, paint siding/trim/soffits with 2-coat system, debris removal |
7–18 days (weather dependent) |
$4,500 – $8,000 |
| Exterior — trim and accent colours only |
Spot prep, scrape/patch where needed, caulk and prime bare spots, repaint trim/accents (no full siding repaint unless included) |
3–8 days |
$1,500 – $3,800 |
| Kitchen cabinet painting (doors, frames, spray finish) |
Degrease and clean, remove/label doors where possible, sand and degloss, prime, spray topcoat, reinstall hardware, light touch-up |
4–10 days (plus dry/cure time) |
$1,200 – $3,800 |
| Specialty / faux finish (accent wall, texture) |
Surface conditioning, custom texture/faux application, protect surrounding areas, final clear/finish coat if required |
2–7 days |
$300 – $5,000 |
Prices are estimates only and vary by project scope, site access and material selection.
What affects the price of painting in Runnymede-Bloor West Village
It’s common in Toronto to see quotes for the “same” painting job swing by 30–50%. The difference usually isn’t the paint—it’s the preparation level, how many coats the contractor includes, and how weather and scheduling constraints are managed. In a neighbourhood like Runnymede-Bloor West Village, two homes can look similar from the curb, yet one has peeling edges at window trims and failing caulking joints that need more scraping and priming. That’s labour-intensive work, and it’s where most of the variation comes from.
Exterior costs are especially sensitive here because the GTA’s exterior season is climate-bound. Contractors typically plan late May to early October when temperatures stay above about 10°C for application and curing. Shorter “ideal” weeks concentrate demand, so summer rates can rise—often reflecting the tighter schedule rather than a larger amount of paint. On top of that, pre-1980 and pre-1978 housing elements are common, which increases the time for scraping, sanding, caulking and priming; in some repaints, prep can be 50–70% of the total labour. A repaint that starts near the $1,500 – $8,000 exterior band can move up quickly if you’re not just coating, but rebuilding failed surfaces.
Concrete examples from local projects: (1) If your siding has blistering or flaking at joints, you’ll likely need extended scraping plus spot priming, which can add hundreds of dollars and extra days. (2) If you have multi-storey access that requires a lift or scaffolding, exterior labour increases even when square footage is moderate. (3) If you’re repainting trim only, you may stay closer to the $1,500 – $3,800 range; but if the paint failure extends into caulk lines and you need broader priming, the job can trend toward full-house pricing.
| Price Factor |
Why It Matters |
Cost Impact |
| Surface prep — scraping, sanding, patching drywall or wood |
Loose paint and uneven surfaces cause early peeling and adhesion failure. |
Adds $300 – $1,500 depending on condition |
| Number of coats — 2-coat system over primer vs. 1 coat over existing |
Exterior and high-wear interior areas typically need true coverage for durability. |
Can shift $200 – $1,200 |
| Paint quality tier — contractor-grade vs. premium (Benjamin Moore, Sherwin) |
Better films can cover better and resist staining, scuffing and weathering. |
Often $150 – $800 difference |
| Ceilings and trim — adds significant time vs. walls-only |
Ceilings require more masking, cutting-in and rolling control; trim needs caulking. |
Usually $300 – $1,000 upward |
| Exterior season window — short season raises summer rates |
Fewer ideal weeks increase scheduling urgency and crew premiums. |
Roughly 10–15% higher in peak weeks |
| Lead-safe precautions — required for pre-1978 homes with lead paint |
Proper containment and dust control slows work and adds cleanup/disposal steps. |
Typically $200 – $1,000 |
| Surface material — drywall vs. plaster vs. wood vs. stucco |
Different materials need different primers and prep methods. |
Can add $250 – $1,600 |
| Height and access — multi-storey exterior requires scaffolding or lifts |
Safe access affects labour time and setup costs. |
Often $400 – $1,800 |
Permits & regulations in Ontario
For painting in Ontario, permits are generally not required for typical residential interior or exterior painting work. Where homeowners need to be mindful is health and safety, not municipal approval. For homes built before 1978, health guidelines recommend testing for lead paint before sanding or scraping, and using lead-safe work practices if lead is present. That means wet methods to reduce dust, HEPA vacuuming, proper containment, and compliant disposal. Homeowners aren’t typically “legally required” to do this testing themselves, but professional contractors in Ontario should follow standard lead-safe practices when the risk is known or suspected—especially on older trim, windows, railings and any areas where paint is deteriorating.
Two key items to verify with any contractor: (1) liability insurance and (2) workers’ compensation coverage (WSIB/WCB). A written contract should clearly state the paint brand/line (and sheen), number of coats, surface prep tasks included, and how repairs are handled (for example, whether caulking replacement is part of the scope).
What requires a permit? In most residential painting scenarios, nothing additional is needed just to repaint. What can require permits is broader work like structural repairs, window replacements, or certain renovations—not the painting itself. Still, if dust control measures or lead remediation are undertaken as part of larger regulated abatement, that’s a separate conversation.
How a homeowner verifies coverage in Runnymede-Bloor West Village: ask for a current certificate of insurance before work starts, confirm the insurer lists the insured contractor as the policyholder, and request evidence of WSIB/WCB coverage. Then, look up the contractor’s licensing and business registration information through the relevant online provincial resources, and match the name/address on the quote to the coverage documents. For lead safety, request the contractor’s written lead-safe method statement for pre-1978 homes (how they contain dust, what they use for HEPA cleanup, and where waste is disposed).
Interior vs exterior painting — getting the best result in Runnymede-Bloor West Village
In Runnymede-Bloor West Village, the difference between a durable paint job and a premature failure is usually prep and system selection—not whether the colour is popular this year. Interiors are forgiving on weather, but not on surface quality. For walls and ceilings, filling and sanding, priming repaired spots, and properly cleaning prior to painting matter more than the topcoat brand. Sheen choice also changes longevity in real life: flat hides imperfections but scuffs more; eggshell is a common balance for living rooms; satin or semi-gloss on trim and higher-touch areas handles cleaning better. The “two coats over the correct primer” rule is practical: it’s typically what makes coverage even and reduces the need to overwork edges.
Exteriors in Toronto, however, live and die by timing and substrate readiness. Before paint goes on, scraping and sanding must remove anything that’s loose, and caulking should be addressed before finish coats so water can’t sneak into cracks. Primer selection matters: some substrates (bare wood, patched spots, certain repairs) need primers designed to lock down and adhere; using the wrong primer can cause bubbling or peeling within a season or two. Unlike coastal BC—where mildew pressure is often the dominant issue—Toronto’s challenges are frost risk, rain interruptions and humidity spikes that affect drying and cure. That’s why crews plan around the late May–June and September–mid October windows when drying is reliable.
Kitchens are a smart budget alternative to replacement: cabinet painting can refresh your look without moving walls. If you’re comparing options, a typical cabinet repaint often starts around the lower end of the trim/cabinet bands; if you’re seeing quotes near the $600 – $4,000 window, the best ones still protect floors, degloss properly, prime correctly, and use spray or equivalent methods for smooth doors.
And for pre-1978 homes, treat peeling and friction-sanding with lead-safe precautions: it’s not just compliance—it’s quality and safety on older trim and window surrounds.
| Project Type |
Key Prep Step |
Recommended Coats |
Price Band |
| Interior — fresh drywall (new construction) |
Seal and prime drywall uniformly to avoid flashing and uneven absorption |
2 coats topcoat (over proper primer), plus spot priming where needed |
$1,200 – $3,200 |
| Interior — repaint (good condition, no repairs) |
Clean, scuff-sand lightly, caulk minor gaps, spot prime problem areas |
2 coats (often 2 full coats for best uniformity) |
$400 – $2,500 |
| Interior — repaint (patching and priming needed) |
Patch, sand, and prime repairs to match sheen and absorption |
2 coats topcoat + primer on repairs |
$600 – $3,500 |
| Exterior siding (wood or fibre cement) |
Scrape to sound edges, caulk joints, prime bare spots before finishing |
2-coat exterior system over primer |
$4,500 – $8,000 |
| Exterior trim and accents only |
Feather edges, prime bare spots, and ensure caulk lines are tight |
2 coats on trim/accents (primer where required) |
$1,500 – $3,800 |
| Kitchen cabinets (spray finish) |
Degrease, degloss/sand, prime correctly for adhesion and block resistance |
Primer + 2 finish coats (sprayed) |
$1,200 – $3,800 |
How to choose a painting contractor in Runnymede-Bloor West Village
Choosing a painter in Runnymede-Bloor West Village comes down to proof: proof of coverage, clarity of scope, and evidence they understand Ontario’s climate realities. Start by verifying licensing/business registration for the contractor entity listed on your quote. Then check liability insurance by requesting a current certificate of insurance—make sure it shows the contractor as the insured party and that coverage is active for the project period. Finally, confirm workers’ compensation coverage (WSIB/WCB). A reputable company will provide proof without pressure, because it protects both sides if something goes wrong.
Next, get 2–3 written, itemised quotes. You want a labour + materials breakdown, not one lump-sum number. Ask how they handle surface prep (scraping, sanding, patching, priming), how many coats they’re including, whether they’ll prime bare areas and caulk changes, and what’s excluded (for example: rotting wood repairs, fence staining, or window re-glazing). Also ask if permit pull is included—again, typical painting doesn’t need permits, but some contractors include the administrative time for any related approvals if the scope includes more than paint.
Look for a workmanship warranty that states what it covers and for how long (and whether product/finish warranty is separate). Confirm whether it’s transferable if you sell your home. For payments, avoid large deposits: never pay more than 10–15% upfront. Use a holdback until the job is complete and cleaned up. Finally, insist on a written timeline with a start date and completion estimate, since GTA weather can shift exterior schedules.
- Request a certificate of liability insurance before work begins.
- Confirm WSIB/WCB coverage and have it match the contractor’s legal entity.
- Get 2–3 itemised quotes (prep, coats, primer, paint line, labour, disposal).
- Ask what preparation is guaranteed: scraping to sound edges, caulking joints, spot priming.
- Verify sheen and finish specs (eggshell vs satin vs semi-gloss) by room.
- Confirm number of coats and whether it includes prime coats over repairs.
- Ask who handles protection and cleanup (drop sheets, edging, vacuuming).
- Clarify surface conditions: how they handle mould spots, chalking, or peeling edges.
- Check if primer and paint are from the specified brand/line, not “equivalent” substitutions.
- Review warranty terms for workmanship and product/manufacturer coverage.
- Agree on payment schedule: 10–15% max deposit; final payment after walkthrough.
- Make sure the timeline is written and includes weather contingencies for exterior work.
Red flags I see in Runnymede-Bloor West Village include: quotes that skip the surface prep details and only list “paint everything,” refusal to provide WSIB/WCB proof, vague paint specifications (“premium paint” with no line or sheen), large upfront payments beyond 10–15%, and no written warranty or no clear scope for caulking/disposal. If they won’t walk you through the prep plan for older trim and peeling areas, that’s usually where you’ll pay later.
Frequently asked questions — painting in Runnymede-Bloor West Village
Can I paint my house exterior in spring or fall in Runnymede-Bloor West Village?
Yes—spring and fall can work very well in Runnymede-Bloor West Village, as long as weather conditions support proper curing. In the GTA, exterior crews typically plan around late May to June, then again September to mid-October, when temperatures are around 10°C or higher for the 24–48 hours after application and rain interruptions are manageable. Painting too early in spring can trap moisture and slow drying; painting too late in fall increases frost risk and can affect adhesion. Because schedules tighten when there are only a few “ideal” weeks, it’s smart to book early for exterior work and confirm the contractor’s weather-monitoring plan. For an exterior repaint, most homeowners land within the $1,500 – $8,000 band depending on prep and access.
How do I choose a painting contractor in Runnymede-Bloor West Village?
Start with verification: ask for liability insurance and evidence of WSIB/WCB coverage, and make sure the documents match the contractor’s legal business name on the quote. Then request 2–3 itemised written quotes that separate labour and materials, including surface prep (scraping/sanding, patching, priming), caulking, and the number of coats by surface type. Read the scope carefully: confirm what’s included for protection and disposal, and what’s excluded (repairs, carpentry, or replacement of damaged building components). Finally, review warranty language and payment terms. A strong contractor usually won’t ask for more than 10–15% upfront and will provide a written timeline. In Ontario conditions, especially for older homes, prep quality is typically what determines whether costs stay near the lower or upper end of typical interior pricing (like the $400 – $6,000 interior range).
How many coats does an exterior repaint need in Runnymede-Bloor West Village?
Most exterior repaints in Runnymede-Bloor West Village follow a 2-coat system over properly primed bare spots. The exact count depends on substrate and paint condition: if there are areas that need primer after scraping and patching, you’re usually looking at primer plus two finish coats overall. In good condition areas, you still need two coats to achieve uniform colour and film thickness. If a contractor proposes “one coat over everything,” that’s a common path to premature failure, especially on trim edges and caulk lines where weather stresses are highest. For reference, full exterior painting often sits within the $4,500 – $8,000 range, while trim-and-accent-only work may land closer to $1,500 – $3,800, depending on how much priming and caulking is required.
What is the best primer for older Runnymede-Bloor West Village homes?
There isn’t one single “best” primer—what matters is matching the primer to the substrate and to the condition of the existing paint. For older homes (many with pre-1980 and often pre-1978 elements), the priority is preparing to sound edges, then priming where paint is bare, patched, or chemically unstable (chalky surfaces or where adhesion is compromised). A contractor may use different primers for wood trim, repaired areas, and any spots where coatings were removed. If lead paint risk is present, lead-safe methods are standard practice when sanding or scraping is required—wet methods and HEPA cleanup, with appropriate disposal. When the primer is chosen correctly and applied in the right conditions, the topcoat performs better and lasts longer through Toronto’s humidity spikes and rain timing.
Should I paint or wallpaper my Runnymede-Bloor West Village home?
In Runnymede-Bloor West Village, either can work, but paint is usually the lower-risk option for most homeowners—especially if you have frequent temperature swings and a mix of older drywall/plaster conditions. Wallpaper can look great, but seams, corners, and moisture-prone spots need careful prep; if the wall isn’t flat and sealed properly, you can get lifting or pattern issues. Paint is often better when you want quick refresh, easier touch-ups, and simpler maintenance. That said, wallpaper can be worth it for a single accent wall if you plan to do it professionally and your walls are stable. If you’re choosing between options for a living room refresh, many projects fall into the interior room band (often around $400 – $1,800), while premium finishes or specialty treatments can move higher.
How do I fix peeling exterior paint in Runnymede-Bloor West Village?
Peeling exterior paint is a “fix the cause” problem, not just a “repaint” problem. In Runnymede-Bloor West Village, the usual causes are moisture intrusion through failing caulking or cracks, chalking/poor adhesion, or paint failure from weather exposure. The proper repair sequence starts with scraping back to sound material, sanding feather edges, cleaning, then applying caulking where joints are compromised before priming. After that, you repaint with the correct exterior system (often a primer plus two finish coats). Because GTA conditions are rain- and humidity-sensitive, drying and curing times matter—contractors need to apply when temperatures are reliably above about 10°C for the next day or two. For lead-safe practice, if your home has pre-1978 components and you’re dealing with deteriorating trim or window areas, professionals should follow lead-safe methods. The cost typically increases with prep, which is why a full exterior repaint commonly falls somewhere in the $1,500 – $8,000 range based on how extensive the failing paint is.